A first-expedition practice sheet
Evidence boundary · September 15, 2026: mechanics below are checked against official FAQ. Checklists and diagrams are editorial aids, not a recorded playtest. We have not captured the current game client or completed a withdrawal ourselves.
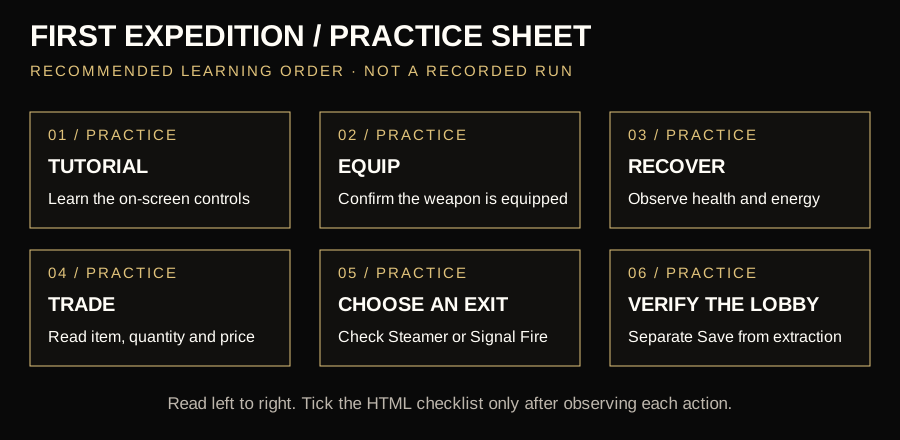
Use this recommended order to learn one action at a time. It is a training sequence, not a fixed map route, a timed speedrun or a claim that every resource is near your spawn. Start in Tutorial and read the free-play and cost guide before activating optional prospecting.
Watch the Tutorial in a recorded client
Ticks stay on this page only and are not saved to an account. They reset on a fresh visit; there is no upload, payment or eligibility check.
What should you record after the first run?
Write down the mode, client build, one action you could not complete and the visible result. “Weapon appears equipped, but the next action fails” is more useful than “the game is confusing.” If a technical error blocks the lesson, use the error-capture checklist before changing the installation.
What should you do before leaving?
Fatal Frontier 1869 gives every new Pioneer a short path into the core loop: navigate the wilderness, fight when necessary, gather visible resources, explore, trade and recover at camp. The official FAQ recommends the Tutorial because it introduces those actions in a few minutes.
Keep the first loadout simple
- Carry a weapon you can use confidently rather than filling every slot with experimental gear.
- Bring a gathering tool so the expedition can fund supplies and travel.
- Leave room for loot. A full pack turns a good find into a difficult decision.
- Watch energy and health before entering a fight or pushing into a new area.
How do you survive the opening minutes?
Your opening route should be about information. Find a mining camp or trading post, learn how the local inventory works, and mark the direction of a possible exit. Hostile animals and bandits can punish a new Pioneer quickly, so disengaging is often the correct decision.
Field rule: learn one safe loop
Repeat a short route that connects a camp, a source of supplies and a recovery point. Once that loop feels predictable, add one new area. This creates useful knowledge without risking an entire run to curiosity.
What counts as progress?
Progress is more than a large gold balance. You are learning which Pioneer fits your style, how much energy a route costs, where useful supplies appear and how long you can stay out before extraction becomes dangerous. A Pioneer who returns with modest loot and better information has still improved your next expedition.
What happens if a Pioneer is injured?
According to the official FAQ, an injured Pioneer becomes temporarily unavailable while recovering. XP earned during that expedition can be lost, while Gold Grains already found and secured are not lost in the same way. Keep another Pioneer available if you want to continue playing while one recovers.
Checked September 15, 2026 against the official Fatal Frontier 1869 FAQ. This guide is unofficial and written for Early Access; mechanics may change.